
Overview
Start with preloaded groups and understand what you can change.
1. View preloaded groups
1) Open Customer Groups.
You’ll see about 20–25 groups (e.g., Parts last 90 days; Equipment last year; Service last week; $0 LTV).
These are ready to use immediately.
You can use the filters and the search tools available to find the exact group you are looking for.
The “My Groups” button at the top of the screen will filter your display to show only groups built by your user ID.
2. Open a group to inspect
1) Click a preloaded group.
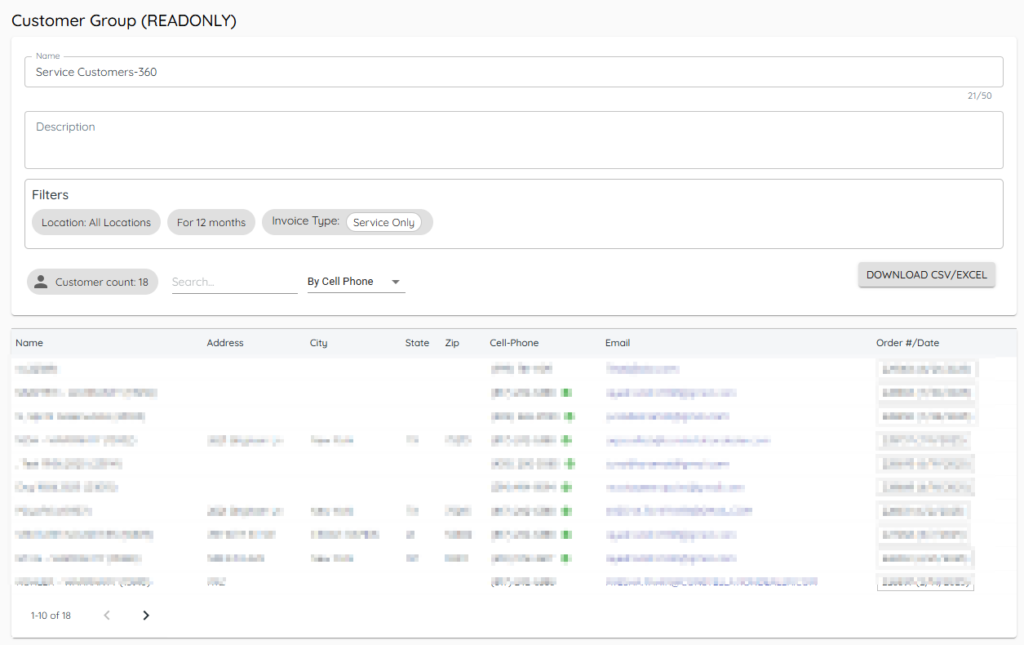
You’ll see members and the filters used.
Preloaded groups are read-only to protect standard definitions.

3. Download members to CSV
1) Click Download.
You’ll see a CSV saved locally.
Use it for reporting or follow-ups.
4. Note cell auto-validation
1) Look for a green check mark next to a cell number.
This indicates a new landline number that has been identified as a cell phone number for a customer that did not previously have one.
This ensures you can text the right number.
Tips to Work Faster
– Clone the logic of a premade group by building your own group with similar filters.
Related KB articles
– Build customer groups with filters
– Apply Customer Status and Customer tags to a Customer Record