
Overview
Automatic loyalty surveys watch selected departments. You control departments, hours, and an optional delay.
1. Open an Automated Loyalty Survey, and navigate to the Settings tab.
2. Make sure the survey is on.
1) If the power button says “Turn On” select it to turn on the survey.

This activates sending based on your settings.
2. Select departments.
1) from the settings tab inside the survey editor switch on Parts, Equipment, and/or Service.
You’ll see green toggles when a department is enabled.
Surveys go out when invoices close in these departments.

3. Set hours
1) Adjust the hours for automated surveys.
You’ll see a daily time range Start Hour/End Hour.
After-hours invoice closures wait until the next morning to send.
4. Add an optional delay
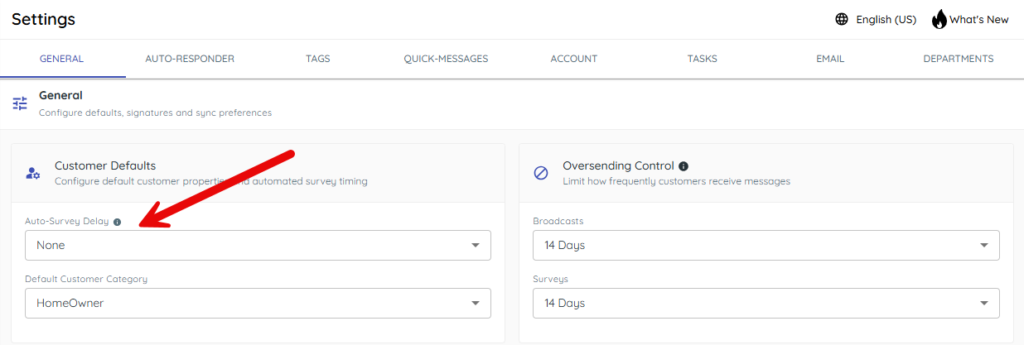
1) In Settings > General, set Auto-Survey delay (None to two weeks).
You’ll see a delay applied to automated sends.
Shorter delays increase response rates.
5. Control over sending
1) In Settings > General, set survey oversending controls (default 14, up to 90).
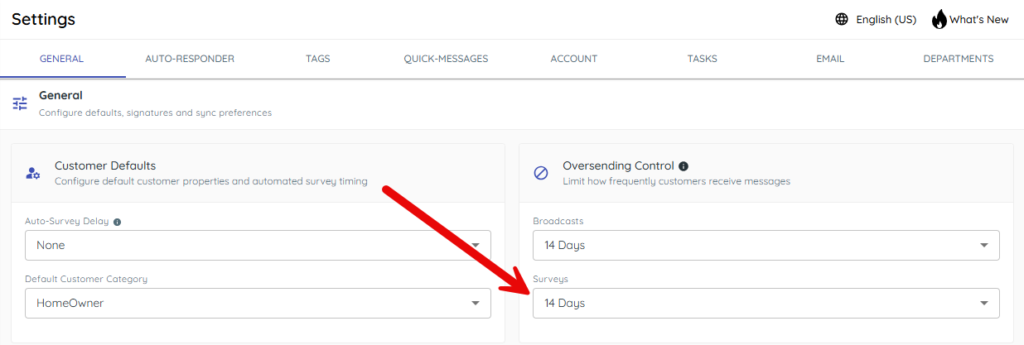
You’ll see a cool-off period that prevents repeat texts.
This oversending control only impacts Broadcast loyalty surveys. Automatic Loyalty surveys have a permanent oversending control of 2 weeks (14 days).
Frequent customers won’t be spammed.
Tips to Work Faster
– For Auto survey delay, start with None or 1 day for fresher feedback.
– Confirm hours to avoid texts outside of your business hours.
Related KB articles
– Create a New Survey in Target CRM
– Review feedback and analyze NPS